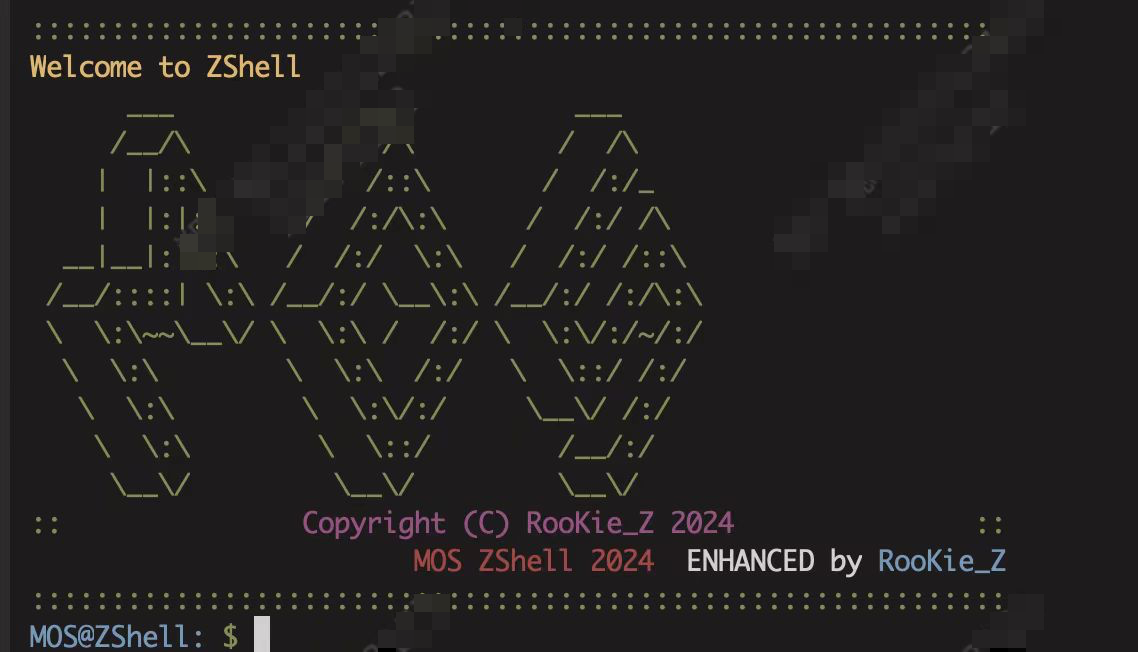
总述 先上图,看看我的成品Shell
由于我选择的是Lab6的挑战性任务,整体的子任务数较多,故接下来的介绍顺序完全 基于我的实现过程,如有不清楚之处,完全源于本人的能力不足,烦请各位看官海涵。
按照评测测试点,我的实现顺序为 $3 \to 4 \to 2 \to 1 \to 5$,接下来按照这种顺序介绍。
具体实现 实现不带 .b 后缀指令 spawn函数与 fork 函数类似,其最终效果都是产生一个子进程,不过与 fork函数不同的是,spawn 函数产生的子进程不再执行与父进程相同的程序,而是装载新的 ELF文件,执行新的程序。
事实上 spawn就是在尝试执行shell 里的命令,所以在这里尝试追加执行是最佳位置。即当用户指定的程序路径不存在时,在这里尝试在路径后追加 .b 再打开。
具体代码:
1 2 3 4 5 6 7 8 9 10 11 12 13 14 15 16 17 18 19 20 21 char tmp[MAXPATHLEN]; if (prog[0 ] != '.' ) { strcpy (tmp, "/" ); strcpy (tmp + 1 , prog); } else { strcpy (tmp, prog); } int fd; fd = open(tmp, O_RDONLY); if (fd < 0 ) { int len = strlen (tmp); strcpy (tmp + len, ".b" ); fd = open(tmp, O_RDONLY); } if (fd < 0 ) { return fd; }
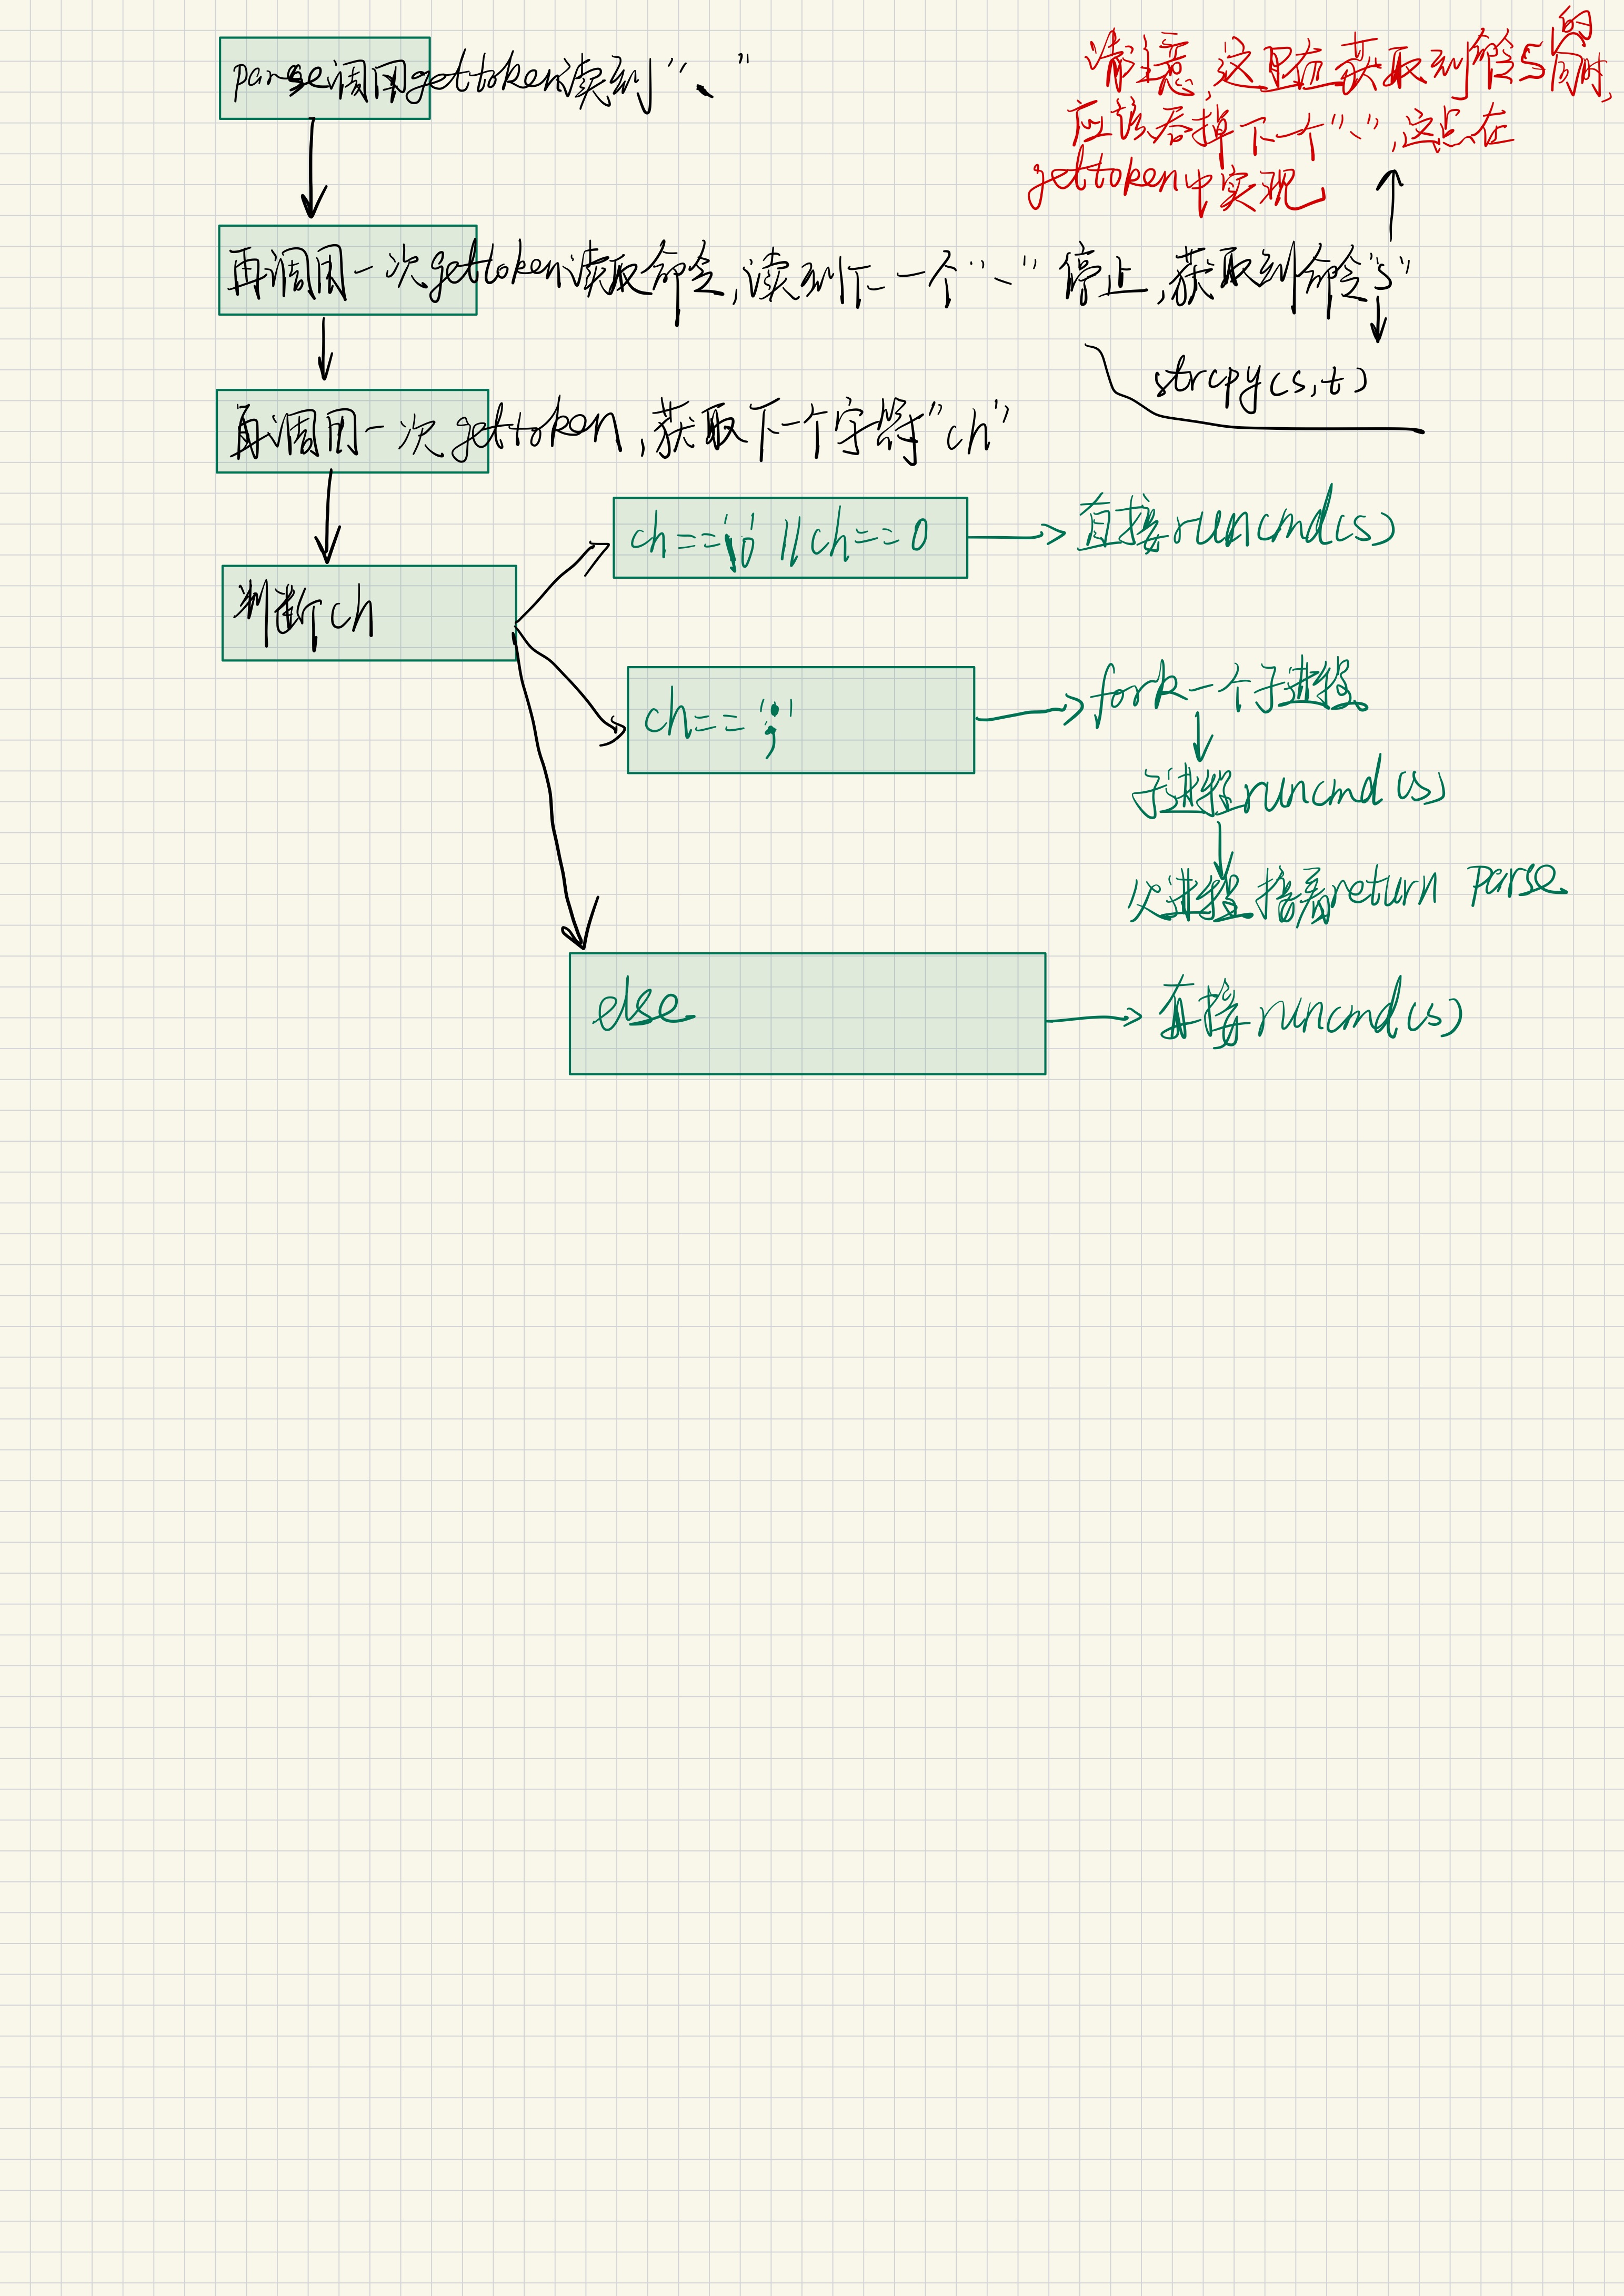
实现反引号、注释和历史指令 实现反引号 实现反引号的思路实际上与引号类似,就是当 parsecmd调用 gettoken读到 ` ,后,进一步解析其后的字符串,直到另一个反引号位置,获取其中的字符串,直接 runcmd(),具体思路可见下面的示意图:
实际上,上述思路的实现尚不成熟,下附代码:
1 2 3 4 5 6 7 8 9 10 11 12 13 14 15 16 17 18 19 20 21 22 23 24 25 26 27 28 29 30 31 32 33 34 35 36 37 38 39 40 41 42 if (*s == '`' ) { in_quot = !in_quot; } if (in_quot) { *p1 = s; while (*s && ((in_quot && !strchr ("`" , *s)) ||!strchr (WHITESPACE SYMBOLS, *s))) { if (*s == '#' ) { while (*s) { *s++ = 0 ; } } else { s++; } } *p2 = s; } case '`' : debugf("clg: use `\n" ); gettoken(0 , &t); char s[100 ]; strcpy (s, t); char ch = gettoken(0 , &t); ch = gettoken(0 , &t); if (ch == 0 || ch == '\0' ) { runcmd(s); } else { if (ch == ';' ) { int fork1 = 0 ; fork1 = fork(); if (fork1) { wait(fork1); return parsecmd(argv, rightpipe, 1 , job_flag); } else { runcmd(s); } } runcmd(s); }
实际上,在后来处理引号的时候,思路就很清晰了:
1 2 3 4 5 6 7 8 9 10 11 12 13 if (*s == '`' ) { *s = 0 ; s++; *p1 = s; while (*s && (*s != '`' )){ s++; } *s++ = 0 ; *p2 = s; return 'r' ; }
实现注释 实际上,注释的功能和读取 空白符并无区别,较为简单,代码见下:
1 2 3 4 5 6 7 8 9 10 11 12 13 *p1 = s; while (*s && (!strchr (WHITESPACE SYMBOLS, *s))) { if (*s == '#' ) { while (*s) { *s++ = 0 ; } } else { s++; } } *p2 = s;
由于历史指令的实现我使用了追加重定向 的功能,故放到下文一并说
实现追加重定向和引号支持 实现引号支持 与上文反引号思路相同,直接给出代码:
1 2 3 4 5 6 7 8 9 10 11 12 13 14 15 16 17 18 19 20 21 22 23 24 if (*s == '\"' ) { *s = 0 ; s++; *p1 = s; while (*s && (*s != '\"' )){ s++; } *s++ = 0 ; *p2 = s; return 's' ; } case 's' : if (argc >= MAXARGS) { debugf("too many arguments\n" ); exit (); } if (need) { argv[argc++] = t; }
实现追加重定向 我的思路是添加一个新的写入方式,即追加 APPEND
1 2 3 4 5 6 #define O_APPEND 0x0004 if ((mode & O_APPEND) != 0 ) { fd->fd_offset = size; }
因为我们的shell 原本就支持对于 >>的解析,所以我们只需要在 parsecmd中稍作修改:
1
2
3
4
5
6
7
8
9
10
11
12
13
14
15
16
17
18
19
20
21
22
23
24
25
26
27
28
29
30
31
32
33
34
35
36
37
38
39
40
41
42
43
44
45
46
47
48
49
case '>' :; int cc; cc = gettoken(0 , &t); if (cc == '>' ) { if (gettoken(0 , &t) != 'w' ) { debugf("syntax error: > not followed by word\n" ); exit (); } if ((fd = open(t, O_WRONLY | O_APPEND | O_CREAT)) < 0 ) { debugf("failed to open '%s'\n" , t); exit (); } if ((r = dup(fd, 1 )) < 0 ) { debugf("failed to duplicate file to <stdout>\n" ); exit (); } close(fd); } else { if (cc != 'w' ) { debugf("syntax error: > not followed by word\n" ); exit (); } if ((fd = open(t, O_WRONLY | O_CREAT)) < 0 ) { debugf("failed to open '%s'\n" , t); exit (); } if ((r = dup(fd, 1 )) < 0 ) { debugf("failed to duplicate file to <stdout>\n" ); exit (); } close(fd); } re_alloc = 1 ;
这里的 re_alloc是一个全局变量,表示指令进行了重定向,在后续一行多指令的实现中起了作用。
实现历史指令 由于我们已经实现了追加写入,那么保存命令就简单了:
1 2 3 4 5 6 7 8 9 10 11 12 13 14 void save_cmd (char * cmd) { int r = open("/.mosh_history" , O_CREAT | O_WRONLY | O_APPEND); if (r < 0 ) { debugf("open /.mosh_history failed to save" ); return r; } write(r, cmd, strlen (cmd)); write(r, "\n" , 1 ); return 0 ; } save_cmd(buf);
接下来就可以通过 history命令调取历史记录并输出:
1 2 3 4 5 6 7 8 9 10 11 12 13 14 15 16 17 18 19 20 21 22 23 24 25 26 27 28 29 if (strcmp (argv[0 ], "history" ) == 0 ) { history(); } void history () { int fdnum = open("/.mosh_history" , O_RDONLY); if (fdnum < 0 ) { debugf("open /.mosh_history failed\n" ); return ; } char buf; int r; int cnt = 0 ; int newline = 1 ; while ((r = read(fdnum, &buf, 1 )) != 0 ) { if (newline) { debugf("%c" , buf); cnt++; newline = 0 ; } else { debugf("%c" , buf); } if (buf == '\n' ) { newline = 1 ; } } }
实现指令回显 由于这部分在评测中尚未涉及,故不多赘述,简单介绍原理
我们知道 Linux对于上下左右键的编码
上下左右键在linux中会被编码为
上: 27 ‘[’ ‘A’
下: 27 ‘[’ ‘B’
右: 27 ‘[’ ‘C’
左: 27 ‘[’ ‘D’
所以我们需要在读到27 [Esc]后连续读取两个字符以判断指令的类型,从而分别调用属于左右键和上下键的不同功能。
具体这部分代码部分参考了Charles学长的博客 ,下附代码:
1
2
3
4
5
6
7
8
9
10
11
12
13
14
15
16
17
18
19
20
21
22
23
24
25
26
27
28
29
30
31
32
33
34
35
36
37
38
39
40
41
42
43
44
45
46
47
48
49
50
51
52
53
54
55
56
57
58
59
60
61
62
63
64
65
66
67
68
69
70
71
72
73
74
75
76
77
78
79
80
81
82
83
84
85
86
87
88
89
90
91
92
93
94
95
96
97
98
99
100
101
102
103
104
105
106
107
108
109
110
111
112
113
114
115
116
117
118
119
120
121
122
123
124
125
126
127
128
129
130
131
132
133
134
135
136
137
138
139
140
141
142
143
144
145
146
147
148
149
150
151
152
153
154
155
156
157
158
159
160
161
162
163
164
165
166
167
168
169
170
171
172
173
174
175
176
177
178
179
180
int newDirCmd = 1 ;int offset; int solveDirCmd (char * buf, int type) { if (newDirCmd == 1 ) { offset = 0 ; } if (type == 0 ) { offset--; } else if (offset < 0 ) { offset++; } int x = 0 ; if (offset == 0 ) { while (buf[x] != '\0' ) { buf[x] = '\0' ; x++; } return -1 ; } int fdnum = open("/.mosh_history" , O_RDONLY); if (fdnum < 0 ) { debugf("open /.mosh_history failed in sloveDir!\n" ); return 0 ; } struct Fd * fd = char * c; char * begin = fd2data(fd); char * end = begin + ((struct Filefd*)fd)->f_file.f_size; c = end - 1 ; while (((*c) == '\n' || (*c) == 0 ) && (c > begin)) { c--; } if (c == begin) { buf[0 ] = '\0' ; return 0 ; } c++; int i; for (i = 0 ; i > offset; i--) { while ((*c) != '\n' && (*c) != '\0' ) { c--; if (c <= begin) { break ; } } c--; if (c <= begin) { break ; } } offset = i; if (c > begin) { while (c > begin && (*c) != '\n' ) { c--; } if ((*c) == '\n' ) { c++; } } else { c = begin; } int now = 0 ; while (buf[now] != '\0' ) { buf[now] = '\0' ; now++; } now = 0 ; while ((*c) != '\n' && (*c) != '\0' && (*c) < end) { buf[now] = *c; now++; c++; } return now; } #define MOVELEFT(y) printf("\033[%dD" , (y)) #define MOVERIGHT(y) printf("\033[%dC" , (y)) void readline (char * buf, u_int n) { int r; int off = 0 ; int len = 0 ; char op; while (off < n) { if ((r = read(0 , &op, 1 )) != 1 ) { if (r < 0 ) { debugf("read error: %d\n" , r); } exit (); } if (op == '\b' || op == 0x7f ) { if (off > 0 ) { if (off == len) { buf[--off] = 0 ; printf ("\033[D \033[D" ); } else { for (int j = off - 1 ; j < len - 1 ; j++) { buf[j] = buf[j + 1 ]; } buf[len - 1 ] = 0 ; MOVELEFT(off--); printf ("%s " , buf); MOVELEFT(len - off); } len -= 1 ; } } else if (op == '\r' || op == '\n' ) { buf[len] = 0 ; return ; } else if (op == 27 ) { char tmp; read(0 , &tmp, 1 ); char tmp2; read(0 , &tmp2, 1 ); if (tmp == 91 && tmp2 == 65 ) { debugf("\x1b[B" ); int j; for (j = 0 ; j < off; j++) { debugf("\x1b[D" ); } debugf("\x1b[K" ); off = solveDirCmd(buf, 0 ); len = strlen (buf); debugf("%s" , buf); } else if (tmp == 91 && tmp2 == 66 ) { int j; for (j = 0 ; j < off; j++) { debugf("\x1b[D" ); } debugf("\x1b[K" ); off = solveDirCmd(buf, 1 ); len = strlen (buf); debugf("%s" , buf); } else if (tmp == 91 && tmp2 == 67 ) { if (off < len) { off++; } else { MOVELEFT(1 ); } } else if (tmp == 91 && tmp2 == 68 ) { if (off > 0 ) { off--; } else { MOVERIGHT(1 ); } } newDirCmd = 0 ; } else { newDirCmd = 1 ; if (off == len) { buf[off++] = op; } else { for (int j = len; j > off; j--) { buf[j] = buf[j - 1 ]; } buf[off] = op; buf[len + 1 ] = 0 ; MOVELEFT(++off); printf ("%s" , buf); MOVELEFT(len - off + 1 ); } len += 1 ; } } debugf("line too long\n" ); while ((r = read(0 , buf, 1 )) == 1 && buf[0 ] != '\r' && buf[0 ] != '\n' ) { ; } buf[0 ] = 0 ; }
由于同时监听了左右键 ,所以同时了实现键入命令时任意位置的修改实现了在当前光标位置进行字符的增加与删除。在不同位置键入后,可以完整回显修改后的命令,并且键入回车后可以正常运行修改后的命令。
实现一行多指令 shell的原理是 main 从控制台读取一行后 fork,把这一行命令传递给子进程。子进程执行完毕后退出,父进程调用 wait函数等待子进程执行结束被摧毁。
因为在 user/sh.c中的保留 SYMBOLS 里已经预留有 ; 字符,gettoken 函数本身就能够解析下一个 ; 字符,所以我们只需要将;作为一个特殊的token即可,我们无需改变词法部分,只需改变语法解释部分。
[!CAUTION]
注意,在实现一行多命令的过程中,务必考虑以下重定向样例
echo "aaa" >> file1; cat file1
如果在上条命令执行后未及时重定向回标准输出,则再进行一次 cat file1会发现 file1中写入了两个 aaa
下附代码:
1
2
3
4
5
6
7
8
9
10
11
12
13
14
15
16
17
case ';' :; if (need == 0 ) { return parsecmd(argv, rightpipe, 1 , job_flag); } else { int child = fork(); if (child) { if (re_alloc == 0 ){ dup(1 , 0 ); } else if (re_alloc == 1 ) { dup(0 , 1 ); } wait(child); return parsecmd(argv, rightpipe, 1 , job_flag); } else { return argc; } }
实现更多指令 touch 没什么好说的,就创建文件就行了,下附代码:
1 2 3 4 5 6 7 8 9 10 11 12 13 14 15 16 17 18 19 20 21 22 23 24 25 #include <lib.h> void usage (void ) { debugf("usage: touch file...\n" ); exit (); } int main (int argc, char *argv[]) { int fd; if (argc < 2 ) { usage(); } for (int i = 1 ; i < argc; i++) { if ((fd = open(argv[i], O_CREAT)) >= 0 ) { close(fd); } else { printf ("touch: cannot touch \'%s\': No such file or directory\n" , argv[i]); } } return 0 ; }
rm rm指令需要解析其输入后的参数,如 -r, -f, -rf等等,我采用了全局变量来实现,同时编写了工具函数 isdir来判断要求的文件是不是目录:
1
2
3
4
5
6
7
8
9
10
11
12
13
14
15
static void init () { enableForce = 0 ; enableRecursive = 0 ; } int isdir (const char * path) { struct Stat st ; if (stat(path, &st) < 0 ) return 0 ; return st.st_isdir; }
主体实现部分为两个函数 rm 和 _rm分别表示删除文件和目录,原理较为简单,rm调用 remove删除文件,_rm则通过遍历目标目录后不断递归调用自身,来实现对于目标目录的递归删除,下附代码:
1
2
3
4
5
6
7
8
9
10
11
12
13
14
15
16
17
18
19
20
21
22
23
24
25
26
27
28
29
30
31
32
33
34
35
36
37
38
39
40
41
42
43
44
45
46
47
48
49
50
51
52
53
54
55
56
57
58
59
60
61
62
63
64
static void rm (const char * path) { int ret; struct Stat st ; if ((ret = stat(path, &st)) < 0 ) { if (!enableForce) printf ("rm: cannot remove \'%s\': No such file or directory\n" , path); return ; } if (st.st_isdir && !enableRecursive) { printf ("rm: cannot remove \'%s\': Is a directory\n" , path); return ; } if (st.st_isdir) _rm(path); ret = remove(path); if (ret != 0 ) debugf("Failed to remove '%s': %d\n" , path, ret); } static void _rm(const char * path){ char dir[MAXPATHLEN]; int fd; if ((fd = open(path, O_RDONLY)) < 0 ) { if (!enableForce) printf ("rm: cannot remove \'%s\': No such file or directory\n" , path); return ; } int size; int ret; int is_dir; struct File file ; while ((size = readn(fd, &file, sizeof (struct File))) == sizeof (struct File)) { if (!file.f_name[0 ]) continue ; strcpy (dir, path); strcat_(dir, "/" ); strcat_(dir, file.f_name); is_dir = isdir(dir); if (is_dir) { if (!enableRecursive) printf ("rm: cannot remove \'%s\': Is a directory\n" , path); else _rm(dir); } ret = remove(dir); if (ret != 0 ) debugf("Failed to remove '%s': %d\n" , dir, ret); } }
mkdir mkdir是这3个指令中最麻烦的一个,考虑到 -p指令的特殊性,为实现这一条指令,新增了不少工具函数:
1 2 3 4 5 6 7 8 9 10 11 12 13 14 15 16 17 18 19 20 21 22 23 24 25 26 27 28 29 30 31 32 33 34 struct Fsreq_create { char req_path[MAXPATHLEN]; u_int req_omode; }; int file_creat (const char * path, u_int omode, struct File** pfile) { char name[MAXNAMELEN]; struct File * dir ; struct File * f ; int ret; if ((ret = walk_path(path, &dir, &f, name)) == 0 ) return -E_FILE_EXISTS; if ((ret != -E_NOT_FOUND) || (dir == NULL )) return ret; if ((ret = dir_alloc_file(dir, &f)) < 0 ) return ret; strcpy (f->f_name, name); f->f_type = (omode & O_MKDIR) ? FTYPE_DIR : FTYPE_REG; if (pfile) *pfile = f; return 0 ; }
在 mkdir.c中,思路与 rm类似,同时创建了 access工具函数,下附代码:
1
2
3
4
5
6
7
8
9
10
11
12
13
14
15
16
17
18
19
20
21
22
23
24
25
26
27
28
29
30
31
32
33
34
35
36
37
38
39
40
41
42
43
44
45
46
47
48
49
50
51
52
53
54
55
56
57
58
59
static void init () { enableParents = 0 ; } int access (const char * path, int type) { char dir[MAXPATHLEN]; struct Stat st ; int ret; while (*path && (*path == ' ' )) path++; strcpy_(dir, path); ret = stat(dir, &st); if (ret < 0 ) { return 0 ; } if (type == FTYPE_DIR) return st.st_isdir; else if (type == FTYPE_REG) return !st.st_isdir; return 1 ; } static int mkdir (const char * path) { char dir[MAXPATHLEN]; const char * p = path; const char * base = path; while (*p != '\0' ) { while (*p && (*p != '/' )) p++; memcpy_(dir, base, p - base); dir[p - base] = '\0' ; while (*p && (*p == '/' )) p++; if (*p) try(_create(dir, enableParents, 0 )); else try(_create(dir, 1 , 1 )); } return 0 ; }
主体 mkdir函数中,通过不断调用 _create函数,来实现目录的递归创建:
1
2
3
4
5
6
7
8
9
10
11
12
13
14
15
16
17
18
19
20
21
22
23
24
25
static int _create(const char * path, int create, int final){ if (access(path, FTYPE_DIR)) { if (!final) return 0 ; printf ("mkdir: cannot create directory \'%s\': File exists\n" , path); return 11 ; } if (!create && !final) { printf ("mkdir: cannot create directory \'%s\': No such file or directory\n" , path); return 13 ; } int ret = creat(path, O_MKDIR); if (ret < 0 ) { debugf("Failed to create '%s': %d\n" , path, ret); return ret; } return 0 ; }
实现指令条件执行 个人认为这是本次挑战性任务中最难的一个点,在深思熟虑后,我并未采取课程组提供的修改 exit函数的思路
指令返回值获取 同时,根据讨论区于恩泽同学的前车之鉴,我新建了专门的 ipc来发送返回值:
1 2 3 4 5 6 7 8 9 10 11 12 13 14 15 16 17 18 19 20 21 22 23 24 25 26 27 28 void ipc_send_cmd (u_int whom, u_int val, const void *srcva, u_int perm) { int r; while ((r = syscall_ipc_try_send_cmd(whom, val, srcva, perm)) == -E_IPC_NOT_RECV) { syscall_yield(); } user_assert(r == 0 ); } u_int ipc_recv_cmd (u_int *whom, void *dstva, u_int *perm) { int r = syscall_ipc_recv_cmd(dstva); if (r != 0 ) { user_panic("syscall_ipc_recv err: %d" , r); } if (whom) { *whom = env->env_ipc_from; } if (perm) { *perm = env->env_ipc_perm; } return env->env_ipc_value; } u_int env_ipc_recving_cmd;
然后在 libos.c 和 debugf.c中进行修改,使相关函数能够发送返回值:
1 2 3 4 5 6 7 8 9 10 11 12 13 14 15 16 17 18 19 20 21 22 23 24 25 26 27 28 void libmain (int argc, char **argv) { env = &envs[ENVX(syscall_getenvid())]; int r; r = main(argc, argv); debugf("Begin send : child %d, parent %d\n" , env->env_id, env->env_parent_id); ipc_send_cmd(env->env_parent_id, r, 0 , 0 ); syscall_env_job_done(env->env_id); exit (); } void _user_panic(const char *file, int line, const char *fmt, ...) { debugf("panic at %s:%d: " , file, line); va_list ap; va_start(ap, fmt); vdebugf(fmt, ap); va_end(ap); debugf("\n" ); ipc_send_cmd(env->env_parent_id, -1 , 0 , 0 ); exit (); }
根据返回值条件执行指令 同时在 runcmd中进行修改,来获取和发送返回值,同时给 parsecmd添加一个参数,根据上条命令的返回值,来指示当前命令是否执行,同时在 gettoken中添加判断,来解析 && 和 ||,下附代码:
1 2 3 4 5 6 7 8 9 10 11 12 13 14 15 16 17 18 19 20 21 22 23 24 25 26 27 28 29 30 31 32 33 34 35 36 37 38 39 40 41 42 43 44 45 46 47 48 49 50 51 52 53 54 55 56 57 58 59 60 61 62 63 64 65 66 67 68 69 70 71 72 73 74 75 76 77 78 79 80 if (*s == '&' ) { if (*(s + 1 ) == '&' ) { *s++ = 0 ; flag = 'a' ; } } if (*s == '|' ) { if (*(s + 1 ) == '|' ) { *s++ = 0 ; flag = 'o' ; } } case 'a' : debugf("we have &&\n" ); if (need) { forkand = fork(); if (forkand == 0 ) { condition = 1 ; return argc; } else { int i = ipc_recv_cmd(NULL , 0 , 0 ); int need_ = (i == 0 ) ? 1 : 0 ; condition = 0 ; return parsecmd(argv, rightpipe, need_, job_flag); } } else { return parsecmd(argv, rightpipe, 1 , job_flag); } …… case 'o' : debugf("we have ||\n" ); if (need) { forkor = fork(); if (forkor == 0 ) { condition = 1 ; return argc; } else { int i = ipc_recv_cmd(NULL , 0 , 0 ); int need_ = (i == 0 ) ? 0 : 1 ; condition = 0 ; return parsecmd(argv, rightpipe, need_, job_flag); } } else { return parsecmd(argv, rightpipe, 0 , job_flag); } if (argc == 0 ) { if (condition) { ipc_send_cmd(env->env_parent_id, 0 , 0 , 0 ); } return ; } int child = spawn(argv[0 ], argv); close_all(); if (child >= 0 ) { if (job_flag) { syscall_env_save_job(child, tmp); } int r = ipc_recv_cmd(NULL , 0 , 0 ); if (condition) { ipc_send_cmd(env->env_parent_id, r, 0 , 0 ); }
实现前后台任务管理 后台任务运行 所谓后台运行所需要的任务便是shell 不需要等待此命令执行完毕后再继续执行 ,即当存在 &时,不进行 wait即可,下附代码:
1 2 3 4 5 6 7 8 9 10 11 12 13 14 15 16 case '&' :; int child_ = fork(); if (child_) { if (re_alloc == 0 ){ dup(1 , 0 ); } else if (re_alloc == 1 ) { dup(0 , 1 ); } re_alloc = 0 ; return parsecmd(argv, rightpipe, 1 , job_flag); } else { re_alloc = 0 ; *job_flag = 1 ; return argc; }
后台任务管理 考虑到如果在用户进程中维护一个任务列表,那么各进程间共享将会非常麻烦,于是进过慎重考虑,我决定在内核维护一个任务列表,通过系统调用来进行操作。
1 2 3 4 5 6 7 8 9 10 11 12 13 14 15 16 17 18 19 20 21 22 23 24 25 26 27 28 29 30 31 32 33 34 35 36 37 38 39 40 41 42 43 44 45 46 47 48 49 50 51 52 53 54 55 56 57 58 59 60 61 62 63 64 65 66 67 68 69 70 71 72 73 74 75 76 77 78 79 80 81 82 83 84 85 86 87 88 89 90 91 struct Job { int status; int envid; char cmd[200 ]; }; static struct Job jobs [2000];void env_save_job (u_int envid, char *cmd) { jobs[job_cnt].envid = envid; strcpy (jobs[job_cnt].cmd, cmd); jobs[job_cnt].status = 1 ; job_cnt++; } void env_job_done (u_int envid) { for (int i = 0 ; i < job_cnt; i++) { if (jobs[i].envid == envid) { jobs[i].status = 0 ; break ; } } } int env_get_job (int i) { if (i > job_cnt) { return -1 ; } return jobs[i - 1 ].envid; } void env_jobs () { char str[20 ]; for (int i = 0 ; i < job_cnt; i++) { if (jobs[i].status == 0 ) { strcpy (str, "Done" ); } else { strcpy (str, "Running" ); } printk("[%d] %-10s 0x%08x %s\n" , i + 1 , str, jobs[i].envid, jobs[i].cmd); } } void sys_env_save_job (u_int envid, char *cmd) { env_save_job(envid, cmd); } void sys_env_job_done (u_int envid) { env_job_done(envid); } int sys_env_get_job (int i) { return env_get_job(i); } void sys_env_jobs () { env_jobs(); } void jobs () { syscall_env_jobs(); } void kill (int job_id) { int envid = syscall_env_get_job(job_id); if (envid == -1 ) { printf ("fg: job (%d) do not exist\n" , job_id); return ; } else if (envs[ENVX(envid)].env_status == ENV_FREE) { printf ("fg: (0x%08x) not running\n" , envid); } else { syscall_env_destroy(envid); syscall_env_job_done(envid); } } void fg (int job_id) { int envid = syscall_env_get_job(job_id); if (envid == -1 ) { printf ("fg: job (%d) do not exist\n" , job_id); return ; } else if (envs[ENVX(envid)].env_status == ENV_FREE) { printf ("fg: (0x%08x) not running\n" , envid); } else { wait(envid); } }
fg即 wait该任务完成。
同时,设置全局变量 job_flag,表示该任务是否为后台任务,需要进行管理,在 runcmd中完成内置指令的实现:
1 2 3 4 5 6 7 8 9 10 11 12 13 14 15 16 17 18 19 20 21 22 23 24 25 else if (strcmp (argv[0 ], "jobs" ) == 0 && argc == 1 ) { jobs(); close_all(); } else if (strcmp (argv[0 ], "kill" ) == 0 && argc == 2 ) { int ret = 0 ; char *s = argv[1 ]; while (*s) { ret = ret * 10 + (*s++ - '0' ); } kill(ret); close_all(); } else if (strcmp (argv[0 ], "fg" ) == 0 && argc == 2 ) { int ret = 0 ; char *s = argv[1 ]; while (*s) { ret = ret * 10 + (*s++ - '0' ); } syscall_env_job_done(ret); fg(ret); close_all(); }
易错点 同时,有几个需要注意的点:
1 2 3 4 5 6 7 8 9 10 11 12 syscall_env_job_done(env->env_id); 在指令结束前将任务设置为Done int sys_cgetc (void ) { int ch; ch = scancharc(); return ch; } 删除了造成忙等的死循环
完结撒花!!! 至此,挑战性任务的所有功能实现完毕
心路历程 从开始到结束,总计135次commit (超过了OO两学期的commit总和),终于是把Shell做完了,虽然是一个残废版的shell,感谢 yez,zyt,zx几位大佬,以及助教 shk不厌其烦地解答我的疑问,是你们拯救了我羸弱的OS,衷心感谢